The DH wanted a new fleece jacket. The DH is hard to fit and fussy about jackets in general. DH also does not love fittings. Hmmmm.
My daughter picked out some really nice fleece from Hancock Fabrics for DH and DH selected Kwik Sew 3187 as the style jacket he wanted me to make.
In general, I like Kwik Sew patterns. I like that they are printed on paper rather than tissue. Kwik Sew directions are usually easy to understand. I've made several fleece projects before, including a very similar style jacket for my daughter using Kwik Sew 3085.... but this project proved difficult.
I know, I know. I should have made a muslin, but the fleece was not much more than the cost of muslin and so I plowed ahead. The directions for the pockets puzzled me. I am not sure why, but I read them and read them and something just did not make sense. I cut the pieces and pinned the pockets according to the instructions but the pockets seemed to hang terrible long and looked like hemming would be problematic with the pocket placement.
I proposed a jacket without pockets but DH was incredulous and told me not to make the jacket if all if it did not have pockets.
After adjusting the pieces and sewing the garment DH decided the jacket was long. Could I cut it shorter? Hmmm. We'd fitted and I'd sewn in the zipper and the dash gone pockets. Shorter? Really?
So the project sits. I know his request is not completely unreasonable. I know I will be able to figure out a way to do it...but right now I need to let it sit...and the man still has no jacket.
The selfish seamstress has a point. It really is easier to sew for yourself.
Thursday, June 9, 2016

Wednesday, June 8, 2016
One Pattern, Many Dresses: Kwik Sew 3394
 |
| Kwik Sew 3394: Dress #2 |
Kwik Sew 3394
 was one of the first patterns I used when I began my ready to waer fast. The pattern has the look and feel of the Fresh Produce and Lulu-B dresses I love. In my first versions, I found some nice cotton interlock on sale at my local Hancock Fabrics before it closed. The first dress was so comfy, I made a second in another fabric. When the two dresses became summer favorites, I bought more fabric to make fall versions with long sleeves. In further versions, I varied the length and I varied the neckline.
Snippets (from Collette Patterns) arrived in my in box and recommended making patterns multiple times. Yup. My third was by far my best. Nicest fabric and best fit. Although I made the dress now years ago and I still love both the pattern and the original versions of the dress. OK, my first attempts look a tad faded and some of the stitching could be improved... but with each wash it gets softer and my stitching stood the test of time. Still a favorite!
 |
| Kwik Sew 3394: dress #1 |
Pattern:
Kwik Sew 3394
Related Tutorials
Use Your Serger to Make a Belt from Scrap Fabric
Embroider a Belt Made from Scrap Fabric
Make a Ruana from an Old Blanket
Blankets and table cloths contain a lot of material. Old blankets with holes or stains can be cut up and repurposed into all sorts of items.
This season, capes, ponchos and ruanas are the rage on the runways, red carpets and as RTW is stores. We decided to cut up an old blanket and use it as the fabric sources for a runway worthy ruana.
We think it looks chic. Not just eco-chic. No need to tell it was repurposed.
Materials
3 to 3 1/2 yds 54" or 60" knit or woven fabric reclaimed from an old blanket, table cloth or other item with a large amount of fabric
Step 1
Determine the size ruana you want to make and take measurements to determine fabric needs. For example, to make an almost ankle length, measure over your shoulder from back hem length to front hem length. Cut less fabric if you want the ruana knee length.
Tip: Polar fleece does not ravel and requires no hem. Polar fleece is a great fabric source for a quick easy blanket to ruana project. For all other fabrics, add hem allowances to length as you will need to hem the edges. Use the full 60" or 54" width of the fabric, minus selvages.
Step 2
Fold the fabric lengthwise so it lies entirely flat. Smooth the fabric with your hands. Measure and clean-cut your length.
Step 3
Cut off the selvages one at a time.
Step 4
Find and mark the center. Fold the fabric lengthwise, then width. Use a pin to mark center.
Step 5
Cut the neckline. Unfold the fabric to full length, half width. Using the pin as a guide, cut a half circle with 1-inch to the back of center. The remaining of the half circle should be to the front of center. Use a 6" diameter for full figured folks, for smaller folk cut a 5" diameter circle.
Step 6
Finish the ruana. Polar fleece will not fray and can be left as cut. To add a decorative touch to fleece, stitch around the edges of the ruana with yarn and a buttonhole stitch or thread and a machine decorative stitch to finish.
For all fabrics other than fleece, finish with a serger or make a quarter-inch stitched hem.
This season, capes, ponchos and ruanas are the rage on the runways, red carpets and as RTW is stores. We decided to cut up an old blanket and use it as the fabric sources for a runway worthy ruana.
We think it looks chic. Not just eco-chic. No need to tell it was repurposed.
Materials
3 to 3 1/2 yds 54" or 60" knit or woven fabric reclaimed from an old blanket, table cloth or other item with a large amount of fabric
Step 1
Determine the size ruana you want to make and take measurements to determine fabric needs. For example, to make an almost ankle length, measure over your shoulder from back hem length to front hem length. Cut less fabric if you want the ruana knee length.
Tip: Polar fleece does not ravel and requires no hem. Polar fleece is a great fabric source for a quick easy blanket to ruana project. For all other fabrics, add hem allowances to length as you will need to hem the edges. Use the full 60" or 54" width of the fabric, minus selvages.
Step 2
Fold the fabric lengthwise so it lies entirely flat. Smooth the fabric with your hands. Measure and clean-cut your length.
Step 3
Cut off the selvages one at a time.
Step 4
Find and mark the center. Fold the fabric lengthwise, then width. Use a pin to mark center.
Step 5
Cut the neckline. Unfold the fabric to full length, half width. Using the pin as a guide, cut a half circle with 1-inch to the back of center. The remaining of the half circle should be to the front of center. Use a 6" diameter for full figured folks, for smaller folk cut a 5" diameter circle.
Step 6
Finish the ruana. Polar fleece will not fray and can be left as cut. To add a decorative touch to fleece, stitch around the edges of the ruana with yarn and a buttonhole stitch or thread and a machine decorative stitch to finish.
For all fabrics other than fleece, finish with a serger or make a quarter-inch stitched hem.
Make a Handbag from Scrap Fabric
The "messenger" style handbag is a classic design that can be found in all cultures throughout the ages. In its simplest form, the messenger style bag is made from one piece of fabric, folded and sewed. Since the bag can be made in many sizes and, depending on size, requires little fabric it is a great project for scrap fabric of all sorts.
It is a good idea to add embroidery or decorations, if any, to the piece of fabric that you intend to be the exterior of the bag prior to assembling the bag.
Tools
Fabric scissors
Rotary cutter
24 x 36 self healing mat
6 x24 quilting ruler
Embroidery scissors
Sewing Machine or Serger (optional)
Materials
8x31 piece heavy, scrap fabric
8x31 piece lighter lining fabric
8x31 piece fusible interfacing
1 yard cord
Serger thread or sewing thread
Needles
Step 1
Place the material on a cutting mat. Measure and mark the fabric with a quilting ruler. Cut two pieces of fabric and a piece of fusible interfacing approximately 8-inches wide x 31-inches long each with scissors or a rotary cutter.
Hint: You can omit the second piece of fabric if you do not want the bag lined.
Step 2
Fuse the interfacing to the wrong side of the fabric that will be the exterior of the bag.
Step 3
Stack the fabric so the wrong side of the lining fabric faces the interfacing side of the exterior fabric.
Step 4
Measure 10-inches from the bottom of the fabric. With right side together, fold the fabric up to create a pocket.
Step 5
Sew the pocket closed using a serger, sewing machine or by hand. Using a serger, continue serging beyond the fold to the end of the fabric to stitch together the exterior and lining and add a finished, decorative edge. Repeat for the second side of the bag. Finish by serging the top portion of the bag.
Step 6
Turn the bag right side out.
Further Reading:
"Hip Handbags"; Valerie Van Arsdale Shrader; 2005.
"Handbag Designer 101"; Emily Blumenthal; 2011.
Related Tutorials
Turn Your Kid's Old Blue Jeans into a Purse
Make a Grocery Bag from Scrap Fabric
Make a Grocery Tote Bag from a T-Shirt
Make a Purse from Blue Jeans Shorts
Make a Throw Blanket from Old Sweaters
It is a good idea to add embroidery or decorations, if any, to the piece of fabric that you intend to be the exterior of the bag prior to assembling the bag.
Tools
Fabric scissors
Rotary cutter
24 x 36 self healing mat
6 x24 quilting ruler
Embroidery scissors
Sewing Machine
or Serger (optional)Materials
8x31 piece heavy, scrap fabric
8x31 piece lighter lining fabric
8x31 piece fusible interfacing
1 yard cord
Serger thread
or sewing threadNeedles
Step 1
Place the material on a cutting mat. Measure and mark the fabric with a quilting ruler. Cut two pieces of fabric and a piece of fusible interfacing approximately 8-inches wide x 31-inches long each with scissors or a rotary cutter.
Hint: You can omit the second piece of fabric if you do not want the bag lined.
Step 2
Fuse the interfacing to the wrong side of the fabric that will be the exterior of the bag.
Step 3
Stack the fabric so the wrong side of the lining fabric faces the interfacing side of the exterior fabric.
Step 4
Measure 10-inches from the bottom of the fabric. With right side together, fold the fabric up to create a pocket.
Step 5
Sew the pocket closed using a serger, sewing machine or by hand. Using a serger, continue serging beyond the fold to the end of the fabric to stitch together the exterior and lining and add a finished, decorative edge. Repeat for the second side of the bag. Finish by serging the top portion of the bag.
Step 6
Turn the bag right side out.
Further Reading:
"Hip Handbags"; Valerie Van Arsdale Shrader; 2005.
"Handbag Designer 101"; Emily Blumenthal; 2011.
Related Tutorials
Turn Your Kid's Old Blue Jeans into a Purse
Make a Grocery Bag from Scrap Fabric
Make a Grocery Tote Bag from a T-Shirt
Make a Purse from Blue Jeans Shorts
Make a Throw Blanket from Old Sweaters
Butterick 5211


The amazing one hour dress. Below is my review from patternreview:
Butterick 5211 Pattern Description:
Misses' Pullover Dresses and Belt
Pattern Sizing:
I cut an 8. My measurements on the day I sewed the project were 34-27-37.
Did it look like the photo/drawing on the pattern envelope once you were done sewing with it?
Yes.
Were the instructions easy to follow?
I did not use them. This is a very simple pattern.
What did you particularly like or dislike about the pattern?
I used only 1 yard of fabric
Fabric Used:
Rayon jersey.
Pattern alterations or any design changes you made:
I omitted facings and used a simple narrow hem on neck, arms & hem. I serge the hem line, arms and neck prior to assembling as a "stay stitch" to control curling and to avoid stretching. I them use the serge stitching to create narrow hem.
Would you sew it again? Would you recommend it to others?
Yes. This was a wearable muslin for more expensive silk.
Conclusion:
Nice, fast pattern. After cutting an adjusting for fit, I was able to sew in under an hour.
KwikSew 3766 & Simplicity 2314
|
It is summer and I really, really wanted a new top and skirt to wear
around town
KS3766and S2314 fit the bill. The skirt was made with less than a yard
of fabric and the top took under an hour to sew. Both were made from scraps in my fabric
stash. In short, I had a low cost outfit that I made in less time than it
would take to go to the mall and shop.
Below are the reviews from PatternReview:
 Learn to Sew Pattern Sizing: I cut a 14 but removed 1 inch from the sides; the next time I will cut an 8. For reference, my measurements today are 34-28-37 Did it look like the photo/drawing on the pattern envelope once you were done sewing with it? Yes Were the instructions easy to follow? I did not use them What did you particularly like or dislike about the pattern? I used only 1 yard of fabric! Fabric Used: Quilting Cotton from my stash. Yes, I know the controversy about quilting cotton for cloths... but it is less expensive than muslin and a nice bottom weight. Pattern alterations or any design changes you made: I added top stitching to all seams. 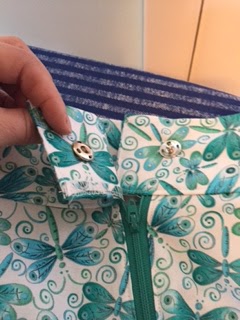 
Would you sew it
again? Would you recommend it to others?
Yes. This is a cute
basic pattern. Different fabrics will give different looks.
Conclusion: Great pattern to use when you have limited fabric. |


KwikSew3766 Pattern Description:
Close fitting pull-over tops
Pattern Sizing:
I cut a size small, but adjusted the shoulders to an XS.
Did it look like the photo/drawing on the pattern envelope once you were done sewing with it?
Yes.
Were the instructions easy to follow?
Yes
What did you particularly like or dislike about the pattern?
I love the old KS patterns that use heavy paper, not tissue paper.
Fabric Used:
Cotton interlock
Pattern alterations or any design changes you made:
I shortened the hem for a more modern look.
Would you sew it again? Would you recommend it to others?
Yes. This is one of my TNT patterns.
Conclusion:
Great pattern for T shirt. Easy Kwik Sew instructions.
Close fitting pull-over tops
Pattern Sizing:
I cut a size small, but adjusted the shoulders to an XS.
Did it look like the photo/drawing on the pattern envelope once you were done sewing with it?
Yes.
Were the instructions easy to follow?
Yes
What did you particularly like or dislike about the pattern?
I love the old KS patterns that use heavy paper, not tissue paper.
Fabric Used:
Cotton interlock
Pattern alterations or any design changes you made:
I shortened the hem for a more modern look.
Would you sew it again? Would you recommend it to others?
Yes. This is one of my TNT patterns.
Conclusion:
Great pattern for T shirt. Easy Kwik Sew instructions.
Thursday, January 2, 2014
2013 Score Card
Well my blog has been neglected but I have been sewing... just no time to write about it.
With the passing of a year, I thought I'd take a moment to report on my success with patterns. I still prefer to drape and sew but I've enjoyed learning new techniques through the discipline of sticking to patterns.
And I've learned why I find adjusting patterns so difficult. After examining the clothes I love in my wardrobe, I discovered that there was a reason I purchased certain style of clothes. I am very petite. I have narrow shoulders and I am short-waisted. I am also pear shaped. I gravitate toward dresses and tops that are self belted because fitted clothes rarely hit my waist. I also favor clothes with raglan, kimono and dolman sleeves -- these clothes compensate for my narrow shoulders.
The advantage of making my own clothes is that I can create fitted clothes that compensate for the particular challenges my body presents -- but I find the math a tad tricky. In a fitted dress, I can adjust the dress to fit my petite frame if I alter EITHER the shoulders OR the waist. But not both. For commercial patterns, that means I have been successful adjusting a fitted waist if the sleeves are raglan, dolman or kimono. And I am able to create patterns with set in sleeves if the waist of the pattern has a self belt. But set in sleeves and a fitted waist are difficult for me to create in a manner that meets my perfectionist demands. With that in mind selecting patterns that work for me has been a lot easier....and it translated into a great many more successful projects than failures.
Here is my report of success and failures for summer style clothes:
Success Pattern OK, But Works Better for My Daughter Failures
NL6120* B5892+ None
V8645 V8408
M6460 V8898
V8807* V8870+
B5606
B5211*
K3956*
V8898
M6654
V8919
KS2771
KS3003
In fairness, the items in my "did not work for me" list are patterns I should never have sewed for myself. I love the hi-lo look on other folks, but I think I must be to old or to set in my ways for that fashion. Although I got complements on both the skirt (B5892) and the dress (V8870) I made, I felt silly wearing them. I wound up cutting up the material and making other items. And I wound up using the hi-lo patterns to make a darling dress (V8870) and a smart looking skirt (B5892) for my teen age daughter. (I've marked those patterns with an +).
V8898 was a bum steer from a blogger who I otherwise adore. V8898 looks darling on MimiG. I selected it because I thought it would be a more stylish version of B5211, which I made in 5 or 6 versions. But rather than looking chic, as it does on MimiG, it looked just plain strange in my boring DC world.
The hall of fame winners for my summer wardrobe are without question B5211and K3956 The simple lines of these two patterns complemented my love of patterned summer fabric. I made both in a variety of woven and knit fabrics ranging from jersey to silk charmeuse with great success. For both patterns, I added a matching fabric self belt or sash to create dresses I loved wearing in only an hour or two (after initially cutting and altering the pattern).
Here is my report of success and failures for fall style clothes:
Success Pattern OK, But Does Not Work for Me Failures
K2771*
K3003
If I had to pick one pattern to use for a fall/winter dress for the rest of my life, it would be
V8919. The pattern is that good! I used the pattern in both the straight and A line versions in multiple fabrics. The pattern looked lovely in silk jersey for fall and sewed up like a dream in both a cotton ponte and a wool double knit. The corvette red cotton ponte was a dynamite choice for the office Xmas party. And the wool double knit version keeps my toasty warm on even the coldest days. I get complements of the dress everywhere I go when I wear V8919, but the greatest complement came from one of my childhood girlfriends mother (a seamstress) who said "Wow, look at your fit on that dress." I felt like I had graduated from my challenge to conquer sewing with patterns. Yay.
K2771 is a two piece dress. While I love, love, love the skirt, I'd have to put the top in the "pattern OK, but does not work for me" pile. The top looked boxy and boring on me. But the skirt I've made multiple times in different fabrics for a great, comfortable look.
In addition, I reused the B5211 and the Simplicity New Look Project Runway 6120 patterns I so enjoyed during the summer in fall fabrics. Again the patterns did not disappoint.
That's it for my 2013 sewing report. Sorry about the lack of pictures.
Happy sewing in the new year!
With the passing of a year, I thought I'd take a moment to report on my success with patterns. I still prefer to drape and sew but I've enjoyed learning new techniques through the discipline of sticking to patterns.
And I've learned why I find adjusting patterns so difficult. After examining the clothes I love in my wardrobe, I discovered that there was a reason I purchased certain style of clothes. I am very petite. I have narrow shoulders and I am short-waisted. I am also pear shaped. I gravitate toward dresses and tops that are self belted because fitted clothes rarely hit my waist. I also favor clothes with raglan, kimono and dolman sleeves -- these clothes compensate for my narrow shoulders.
The advantage of making my own clothes is that I can create fitted clothes that compensate for the particular challenges my body presents -- but I find the math a tad tricky. In a fitted dress, I can adjust the dress to fit my petite frame if I alter EITHER the shoulders OR the waist. But not both. For commercial patterns, that means I have been successful adjusting a fitted waist if the sleeves are raglan, dolman or kimono. And I am able to create patterns with set in sleeves if the waist of the pattern has a self belt. But set in sleeves and a fitted waist are difficult for me to create in a manner that meets my perfectionist demands. With that in mind selecting patterns that work for me has been a lot easier....and it translated into a great many more successful projects than failures.
Here is my report of success and failures for summer style clothes:
Success Pattern OK, But Works Better for My Daughter Failures
NL6120* B5892+ None
V8645 V8408
M6460 V8898
V8807* V8870+
B5606
B5211*
K3956*
V8898
M6654
V8919
KS2771
KS3003
In fairness, the items in my "did not work for me" list are patterns I should never have sewed for myself. I love the hi-lo look on other folks, but I think I must be to old or to set in my ways for that fashion. Although I got complements on both the skirt (B5892) and the dress (V8870) I made, I felt silly wearing them. I wound up cutting up the material and making other items. And I wound up using the hi-lo patterns to make a darling dress (V8870) and a smart looking skirt (B5892) for my teen age daughter. (I've marked those patterns with an +).
V8898 was a bum steer from a blogger who I otherwise adore. V8898 looks darling on MimiG. I selected it because I thought it would be a more stylish version of B5211, which I made in 5 or 6 versions. But rather than looking chic, as it does on MimiG, it looked just plain strange in my boring DC world.
The hall of fame winners for my summer wardrobe are without question B5211and K3956 The simple lines of these two patterns complemented my love of patterned summer fabric. I made both in a variety of woven and knit fabrics ranging from jersey to silk charmeuse with great success. For both patterns, I added a matching fabric self belt or sash to create dresses I loved wearing in only an hour or two (after initially cutting and altering the pattern).
Here is my report of success and failures for fall style clothes:
Success Pattern OK, But Does Not Work for Me Failures
V8919* None M6654
V8408 (OOP)K2771*
K3003
If I had to pick one pattern to use for a fall/winter dress for the rest of my life, it would be
V8919. The pattern is that good! I used the pattern in both the straight and A line versions in multiple fabrics. The pattern looked lovely in silk jersey for fall and sewed up like a dream in both a cotton ponte and a wool double knit. The corvette red cotton ponte was a dynamite choice for the office Xmas party. And the wool double knit version keeps my toasty warm on even the coldest days. I get complements of the dress everywhere I go when I wear V8919, but the greatest complement came from one of my childhood girlfriends mother (a seamstress) who said "Wow, look at your fit on that dress." I felt like I had graduated from my challenge to conquer sewing with patterns. Yay.
K2771 is a two piece dress. While I love, love, love the skirt, I'd have to put the top in the "pattern OK, but does not work for me" pile. The top looked boxy and boring on me. But the skirt I've made multiple times in different fabrics for a great, comfortable look.
In addition, I reused the B5211 and the Simplicity New Look Project Runway 6120 patterns I so enjoyed during the summer in fall fabrics. Again the patterns did not disappoint.
That's it for my 2013 sewing report. Sorry about the lack of pictures.
Happy sewing in the new year!
Tuesday, November 15, 2011
Turn Your Kid's Old Blue Jeans into a Purse
 |
| Before: worn, outgrown jeans |
Some of my daughter's old jeans have really nice, decorative pockets that can be reclaimed and repurposed to add interesting details to the bag.
While this bag can be created with a sewing machine or a serger, I recently learned how to use the piping foot of my serger to install a zipper, making the assembly of this blue jeans bag super fast.
Here is how we did it:
Tools
 |
| After: Repurposed Blue Jeans Purse |
Rotary cutter
24 x 36 self healing mat
6 x24 quilting ruler
Embroidery scissors
Sewing Machine
or Serger (optional)Materials
Old blue jeans or other heavy, scrap fabric
Serger thread
or sewing threadNylon or polyester zipper
Needles
Step 1
 |
| Cut jeans |
 |
| Cut fabric & place pocket |
Cut a piece of blue jean fabric about 9-inches x 20-inches. Place the pocket where you want it to be on the bag. Pin the pocket in place.
Step 3
Sew the pocket to the material using a top stitch about 1/4-inch from the edge of the pocket.
Hint: An edge stitch or stitch in the ditch presser foot will make the job a lot easier.
Step 4
Place the nylon or polyester zipper at the edge of the fabric so the right side of the fabric faces the right side of the zipper tape.
Warning: If you are using a serger, select a zipper that is at least four inches wider than your fabric. The zipper must be wider than the fabric so the blade is not damaged when serging the zipper in place. Also, do not use a metal zipper on a serger or you could damage your blade.
Step 5
Pin or baste or glue baste the zipper to the fabric.
 |
| Glue baste |
Step 6
Sew one side of the zipper. Repeat for the second side of the zipper.
Step 7
 |
| Cut inseam |
 |
| Serge inseam to create handle |
Determine the length handle you want for your bag and cut the serged inseam to that length.
Step 8
Turn the bag so it is inside out. Insert the serged inseam you prepared as a hnadle just above the zipper so each end of the inseam pokes out of the bag and will be caught and sewn in place as you sew or serge the sides of the bag closed. Check to be sure the handle of the bag will not be caught, just the ends. Sew or serge the edges of the bag.
 |
| Add depth to bag |
Add depth to your bag by folding the bottom corners of the bag out and serging over the corners.
Step 10
 |
| Handbag from repurposed blue jeans |
Further Reading:
"Hip Handbags"; Valerie Van Arsdale Shrader; 2005.
"Handbag Designer 101"; Emily Blumenthal; 2011.
Related Tutorials
Make a Grocery Bag from Scrap Fabric
Make a Grocery Tote Bag from a T-Shirt
Make a Purse from Blue Jeans Shorts
Make a Throw Blanket from Old Sweaters
Monday, November 7, 2011
Pattern Report: Vogue 8777, Katherine Tilton
This is the first review for a pattern I never made. I bought V8777 because I loved, loved, loved the design. I purchased some really nice wool that I wanted to turn into a vest. I often take out patterns and read the pattern through the evening or so before I begin a new project. Light reading.
This pattern was the first where I was sure something was missing. Often, when a pattern confuses me I assume my inexperience is the problem. That may be the case with this pattern as well, but after shutting off the TV and reading and then re-reading the pattern several times, I still could not make heads or tails out of the instructions.
I turned to patternreview.com for help and saw that V8777 had never been reviewed. Oops. I forgot. When I bought the pattern I knew that there were no reviews. I attributed the lack of review to the simple design....but maybe others found the pattern instructions as confusing as I did.
Vogue pattern 1124 is a Sandra Betzina design with a similar look, so perhaps I will purchase V1124 and give it a try to make my vest.
This pattern was the first where I was sure something was missing. Often, when a pattern confuses me I assume my inexperience is the problem. That may be the case with this pattern as well, but after shutting off the TV and reading and then re-reading the pattern several times, I still could not make heads or tails out of the instructions.
I turned to patternreview.com for help and saw that V8777 had never been reviewed. Oops. I forgot. When I bought the pattern I knew that there were no reviews. I attributed the lack of review to the simple design....but maybe others found the pattern instructions as confusing as I did.
Vogue pattern 1124 is a Sandra Betzina design with a similar look, so perhaps I will purchase V1124 and give it a try to make my vest.
Wednesday, November 2, 2011
Sewing Books for a Cold Fall Day
Like many of you, I like to read about sewing almost as much as I enjoy sewing. The process of advancing my skills and technique excite me. I return to many of my sewing reference books a lot and each time I see things in a new way.
This week I went to the library and checked out a bunch of sewing books. Many were real winners.
For advanced beginner to rather advanced sewers, I highly recommend the following two books. Both contain lots of photos and thoughtful tips and techniques that will likely save you time. Your skill will depend on how much you get of the book, but there is likely something for most:
Secrets of Successful Sewing: Techniques for Your Sewing Machine & Serger; Barbara Weiland; 1997.
The Dressmaker's Handbook of Couture Sewing Techniques; Lynda Maynard; 2010.
I told you how difficult a time I had working with patterns. Every pattern I made came out HUGE. I would have saved a LOT of time if I had read this book before beginning my adventures in sewing with patterns. No matter what your body type or sewing issue, this book likely explains how to adjust the pattern to (in the wise words of Tim Gunn) make it work for you. It is a really, really helpful book:
Every Sewer's Guide to the Perfect Fit: Customizing Patterns for a Sensational Look; May Morris, Sally McCann, G Street Fabrics; 1997.
My only quarrel with the book is that it was co-authored by G Street and yet the G Street folks were no help to me at all when I explained the problem of excess ease and my frustration with making the patterns fit me. Why didn't they tell me about the book they wrote? hmmmm
As you know, my favorite way to sew is to use garments hanging in our closet as a guide. Garments we own fit and look flattering. Duplicating the design of garments we wear is almost always a sure success. Until recently I was not very disciplined when duplicating designs. I just draped, cut and sewed. The issue is I had to repeat every time. I wanted to be able to expand to create master patterns of designs that work for me and my family. This
book is instructive (although the video by Nancy Zieman was also a great help).
Patterns from Finished Clothes: Re-Creating the Clothes You Love; Tracy Doyle; 1996.
There were a couple classic sewing books on the shelf that I either had not seen before or had not reviewed in a while. All had helpful hints, especially for beginning sewers:
Vogue Easy Sewing; Lynn C. Ferrari; 1985.
The Complete Book of Sewing; Deni Brown;1996
I loved reading the classic text on patternmaking. Whilemy interest is only in creating patterns for me and my family, the concepts and sketches in this book were a nice complement to the G Street book:
Patternmaking for Fashion Design (3rd Ed.); Helen Joseph-Armstrong; 2000.
Finally, I spent time reading a specialty book on handbags. Making handbags is one of my very favorite use of scrap fabric. The concept of this book was to give a handful of basic patterns and then show how to adapt these basic designs. This is another really fun idea book:
Hip Handbags; Valerie Van Arsdale Shrader; 2005.
This week I went to the library and checked out a bunch of sewing books. Many were real winners.
For advanced beginner to rather advanced sewers, I highly recommend the following two books. Both contain lots of photos and thoughtful tips and techniques that will likely save you time. Your skill will depend on how much you get of the book, but there is likely something for most:
Secrets of Successful Sewing: Techniques for Your Sewing Machine & Serger; Barbara Weiland; 1997.
The Dressmaker's Handbook of Couture Sewing Techniques; Lynda Maynard; 2010.
I told you how difficult a time I had working with patterns. Every pattern I made came out HUGE. I would have saved a LOT of time if I had read this book before beginning my adventures in sewing with patterns. No matter what your body type or sewing issue, this book likely explains how to adjust the pattern to (in the wise words of Tim Gunn) make it work for you. It is a really, really helpful book:
Every Sewer's Guide to the Perfect Fit: Customizing Patterns for a Sensational Look; May Morris, Sally McCann, G Street Fabrics; 1997.
My only quarrel with the book is that it was co-authored by G Street and yet the G Street folks were no help to me at all when I explained the problem of excess ease and my frustration with making the patterns fit me. Why didn't they tell me about the book they wrote? hmmmm
As you know, my favorite way to sew is to use garments hanging in our closet as a guide. Garments we own fit and look flattering. Duplicating the design of garments we wear is almost always a sure success. Until recently I was not very disciplined when duplicating designs. I just draped, cut and sewed. The issue is I had to repeat every time. I wanted to be able to expand to create master patterns of designs that work for me and my family. This
book is instructive (although the video by Nancy Zieman was also a great help).
Patterns from Finished Clothes: Re-Creating the Clothes You Love; Tracy Doyle; 1996.
There were a couple classic sewing books on the shelf that I either had not seen before or had not reviewed in a while. All had helpful hints, especially for beginning sewers:
Vogue Easy Sewing; Lynn C. Ferrari; 1985.
The Complete Book of Sewing; Deni Brown;1996
I loved reading the classic text on patternmaking. Whilemy interest is only in creating patterns for me and my family, the concepts and sketches in this book were a nice complement to the G Street book:
Patternmaking for Fashion Design (3rd Ed.); Helen Joseph-Armstrong; 2000.
Finally, I spent time reading a specialty book on handbags. Making handbags is one of my very favorite use of scrap fabric. The concept of this book was to give a handful of basic patterns and then show how to adapt these basic designs. This is another really fun idea book:
Hip Handbags; Valerie Van Arsdale Shrader; 2005.
Sunday, October 30, 2011
Pattern Report: Simplicity, Cynthia Rowley 2305, two more satin party dresses
After finishing the berry colored satin party dress for my daughter, I began the second dress for my daughter. She selected an lovely, emerald green satin fabric from Hancock Fabrics and a Cynthia Rowley pattern, Simplicity 2305.
The Cynthia Rowley pattern, Simplicity 2305 does not have the elastic sleeves my daughter found objectionable in Kwik Sew 3538, but the pattern does have very sculpted and quilted sleeves that produce a puffy look at the top of the sleeve. I pointed the sleeve out to my daughter and we went online to look at finished dresses on pattern review. She thought she liked the look... I spent to hours working on the sleeeves...only to discover that she really did not like the look of the quilted sleeve. Again, the puffiness was a problem...are you seeing a theme?
The pattern envelope has a photo of a girl wearing a skirt that is version D of this pattern and a top that is not included in the pattern options but looks a lot like the bodice before adding the quilted sleeves. I showed the envelop to my daughter and suggested we remove the quilted sleeves. Since she is petite, the sleeves were longer than the photo, almost to her elbows and gave the dress a nice look that would not leave her cold in a party during a fall evening. Dress saved.
My daughter paired the dress with the same black leather belt she used for the berry colored dress so I decided that the waist band was unnecessary work and if I made the dress again I would sew it an one piece rather than the separate skirt and bodice per the pattern.
The third dress my daughter asked me to make was a fabulous black and white polka dot chiffon that she wanted me to make using Vogue DKNY pattern 1160. After reading the PR reviews, it was clear that the sleeves on 1160 are difficult to make...but more important, had the same unusual design my daughter was finding objectionable in earlier dresses. After examining the photo of the  DKNY dress, I decided to use my adapted Cynthia Rowley 2305 pattern to make the polka dot chiffon dress. I omitted the quilted sleeve and combined the bodice and skirt in one cut. The dress was quick to sew and once belted had the look my daughter
  wanted without the fuss of persuading a teenager to stop for fittings.
Here's the review:
Pattern Description:
Pattern Sizing:
I made a size 6 for my petite daughter, but needed to shorten the dress by about 4 inches and take in the sides quite a bit.
Did it look like the photo/drawing on the pattern envelope once you were done sewing with it?
Were the instructions easy to follow? Yes.
What did you particularly like or dislike about the pattern?
My daughter disliked the sleeves, which were quite puffy.
Fabric Used:
Satin from Hancock Fabrics
Pattern alterations or any design changes you made:
I removed the quilted sleeve detail in the first dress.
In the second dress, I omitted the quilted sleeve and cut the bodice and skirt as one piece (omitting the waist band and substituting a self belt).
Would you sew it again? Would you recommend it to others?
Yes. I've made this dress twice for my daughter and think it is a winner.
Conclusion: This is a really nice pattern.
The Cynthia Rowley pattern, Simplicity 2305 does not have the elastic sleeves my daughter found objectionable in Kwik Sew 3538, but the pattern does have very sculpted and quilted sleeves that produce a puffy look at the top of the sleeve. I pointed the sleeve out to my daughter and we went online to look at finished dresses on pattern review. She thought she liked the look... I spent to hours working on the sleeeves...only to discover that she really did not like the look of the quilted sleeve. Again, the puffiness was a problem...are you seeing a theme?
The pattern envelope has a photo of a girl wearing a skirt that is version D of this pattern and a top that is not included in the pattern options but looks a lot like the bodice before adding the quilted sleeves. I showed the envelop to my daughter and suggested we remove the quilted sleeves. Since she is petite, the sleeves were longer than the photo, almost to her elbows and gave the dress a nice look that would not leave her cold in a party during a fall evening. Dress saved.
My daughter paired the dress with the same black leather belt she used for the berry colored dress so I decided that the waist band was unnecessary work and if I made the dress again I would sew it an one piece rather than the separate skirt and bodice per the pattern.
 |
| Simplicity 2305, front vi |
 DKNY dress, I decided to use my adapted Cynthia Rowley 2305 pattern to make the polka dot chiffon dress. I omitted the quilted sleeve and combined the bodice and skirt in one cut. The dress was quick to sew and once belted had the look my daughter
  wanted without the fuss of persuading a teenager to stop for fittings.
Here's the review:
Pattern Description:
Pattern Sizing:
I made a size 6 for my petite daughter, but needed to shorten the dress by about 4 inches and take in the sides quite a bit.
Did it look like the photo/drawing on the pattern envelope once you were done sewing with it?
Were the instructions easy to follow? Yes.
What did you particularly like or dislike about the pattern?
My daughter disliked the sleeves, which were quite puffy.
Fabric Used:
Satin from Hancock Fabrics
Pattern alterations or any design changes you made:
I removed the quilted sleeve detail in the first dress.
In the second dress, I omitted the quilted sleeve and cut the bodice and skirt as one piece (omitting the waist band and substituting a self belt).
Would you sew it again? Would you recommend it to others?
Yes. I've made this dress twice for my daughter and think it is a winner.
Conclusion: This is a really nice pattern.
Thursday, October 27, 2011
Pattern Report: Vogue 8522, purple fleece jacket
 |
| Vogue 8522 made with purple fleece |
Pattern Description: Jacket with kimono sleeves
Pattern Sizing: 8-16
I made a size 8.
Did it look like the photo/drawing on the pattern envelope once you were done sewing with it? yes.
Were the instructions easy to follow? yes
What did you particularly like or dislike about the pattern?
Fabric Used: purple fleece on sale for $3/yard at Hancock Fabrics.
Pattern alterations or any design changes you made: None
Would you sew it again? Would you recommend it to others?
Yes. This jacket is cute. I would have made one for myself, bu my daughter forbade it...I'll have to wait a year or two, but I will make this jacket for me using a nice wool.
Conclusion: Vogue 8522 is a winner!
Further Reading:
Vogue Revised & Updated
Vogue Sewing; Editors of Vogue & Butterick
Tuesday, October 4, 2011
Updated Scorecard!
I've spent so much free time sewing, I am behind on both reviews and photographs.... but I wanted to share the "scorecard" for my sewing with a pattern adventure for late September and early October.
Recommend
Simplicity 1989 (woven dress)
Butterick 5211 (woven dress)
Kwik Sew 3379 (fleece jacket)
Pattern OK, but will not Sew Again
Kwik Sew 3658 (knit dress)
Photos to follow.
Recommend
Simplicity 1989 (woven dress)
Butterick 5211 (woven dress)
Kwik Sew 3379 (fleece jacket)
Pattern OK, but will not Sew Again
Kwik Sew 3658 (knit dress)
Photos to follow.
Sunday, October 2, 2011
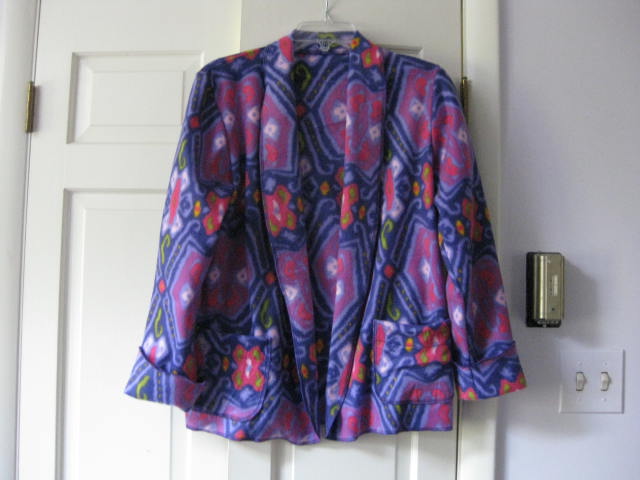
Pattern Report: Kwik Sew 3379, purple fleece blazer
 |
| Kwik Sew 3379 |
Pattern Sizing: XS-S-M-L-XL
I made the extra small.
Did it look like the photo/drawing on the pattern envelope once you were done sewing with it? Yes
Were the instructions easy to follow? Yes
What did you particularly like or dislike about the pattern?
Although the description is "cardigan," the drawing looked more like an unstructured jacket. I like the shape and the fabric drapes well. I also like the pocket placement!!
The pattern calls for serging the edges for decorative effect. While I liked the look, I had trouble maintaining proper tension and the edges turned out a tad more wavy in places than I preferred.
Fabric Used: Fleece on sale from Hancock Fabrics for $3/yard
Pattern alterations or any design changes you made: None
Would you sew it again? Would you recommend it to others?
I may sew this again. I like the shape, but I think I will finish the next garment in a different manner.
Conclusion: I do recommend this pattern. It was easy and the finished garment has a nice shape.
Saturday, October 1, 2011
Pattern Report: Simplicity 1989, classic woven dress
 |
| Simplicity 1989 in silk charmeuse |
Pattern Sizing: Size 6-8-10-12-14-16-18
I cut an 8 at the top and then tapered down to a size 12 on the bottom.
 |
| Simplicity 1989 |
Were the instructions easy to follow? Yes, very.
 |
| Simplicity 1989, wearable muslin in rayon |
Fabric Used:
I used a rayon from Fabric Mart on sale $3/yard as my wearable muslin. I liked the dress so much I wore it to a cocktail party. My second and third dresses using this pattern were made from printed silk charmeuse. I used VERY different fabrics for each dress and my family were surprised when I told them all three dresses were made from the same pattern.
Pattern alterations or any design changes you made:
I added a facing to the neckline and then I used decorative top stitch rather than using bias tape.
I adjusted the bust dart.
I added fullness to the sleeves by cutting the sleeves to a 10, but left the armscythe an 8.
On the third dress I made using this pattern, I laid the back piece on the fold. The back center seam was not needed and interfered with the pattern on the lovely blue silk charmeuse.
Would you sew it again? Would you recommend it to others?
Yes. This pattern is a keeper! I highly recommend this pattern.
Conclusion: A great pattern!
Friday, September 23, 2011
Pattern Report: Butterick 5211, silk panel dress
 |
| Butterick 5211 |
Pattern Description: Fast & Easy, Misses' Dress and Belt
Pattern Sizing: BB, 8, 10, 12, 14
I cut a size 8 on the top and then tapered down to a size 12.
Did it look like the photo/drawing on the pattern envelope once you were done sewing with it? Yes!
Were the instructions easy to follow? Yes.
What did you particularly like or dislike about the pattern?
I was using a very expensive panel silk and I wanted a simple pattern that showed off the panel but that I could cut using only two yards of fabric.
Fabric Used:
A really yummy red panel silk from Exquisite Fabrics in Georgetown.
Pattern alterations or any design changes you made:
I cut the back on the fold to take advantage of the panel.
Would you sew it again? Would you recommend it to others? Yes I will likely sew it again and I highly recommend this pattern. It is a simple pattern that shows off prints and was especially good for a print panel.
Conclusion: B5211 is a great pattern. I will likely use it again and I highly recommend it. Photos to follow.
Subscribe to:
Posts (Atom)